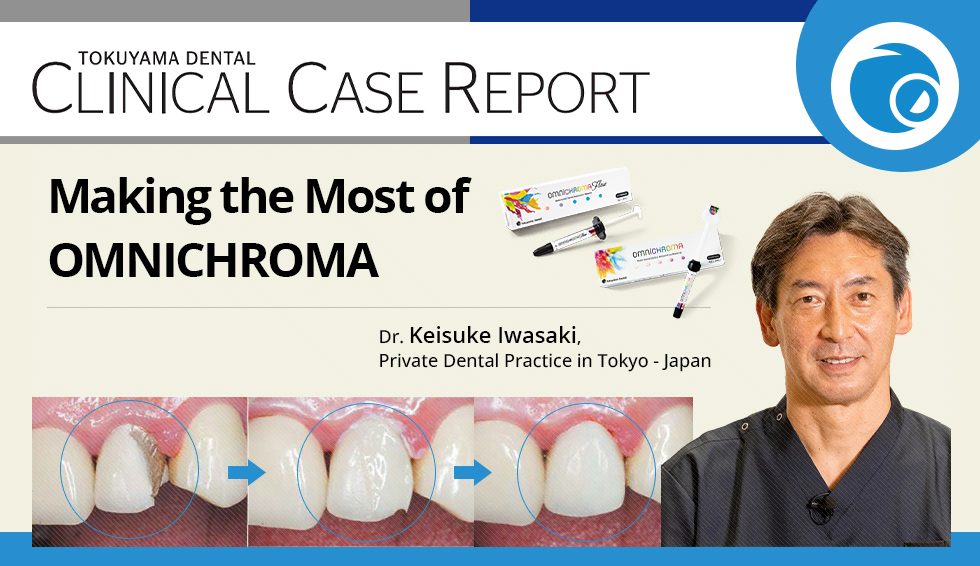
OMNICHROMA, a light-curable composite resin that uses structural color, has been introduced, and I imagine many dentists are already using it in clinical practice. While only the paste had been available up until this point, the launch of the flowable OMNICHROMA FLOW has dramatically expanded the range of clinical applications. When I first began using OMNICHROMA in my own practice, I was worried about whether a milky white paste could really blend with the shade of the tooth. However, I still recall how impressed I was when the shade blended perfectly after light curing. For small cavities or cases with relatively high value, OMNICHROMA alone blends in well in most cases, giving satisfying results. That said, questions remain as to whether a single syringe can reproduce every shade, and in practice, there are cases where the shade does not quite match, especially in cavities of moderate size or larger. Discussions of OMNICHROMA tend to focus almost entirely on shade, but its physical properties are also on par with or better than previous products, making it an extremely valuable material when used to its full potential.
Case 1: Class I Molar Cavity (Equivalent to A2, No Discoloration)
Re-restoration was planned after the body of the metal inlay in a molar fractured. The metal inlay was carefully removed, the carious lesion was checked and removed, and the enamel cavity margin was then finished. While the shade does not need to be scrutinized using a shade guide, an overall visual check is still necessary. In this case, the tooth shade (value) was equivalent to A2 and the cavity was classified as Class I, with no discoloration or other effects, so it was determined that restoration with OMNICHROMA alone would be sufficient.
After enamel etching, the tooth surface was treated with BONDMER Lightless. Next, lining was performed using OMNICHROMA FLOW. The cavity was then filled with OMNICHROMA in separate buccal and palatal increments, with light curing after each. After contouring and occlusal adjustment, final polishing completed the restoration. The postoperative photograph also shows good shade blending, and there are no functional concerns.
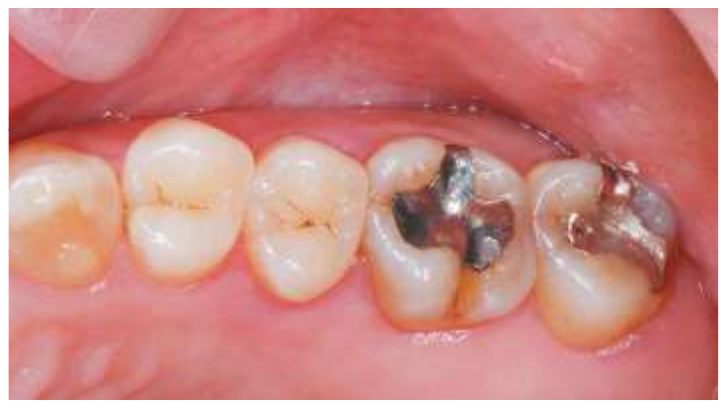
Fig. 1 Preoperative
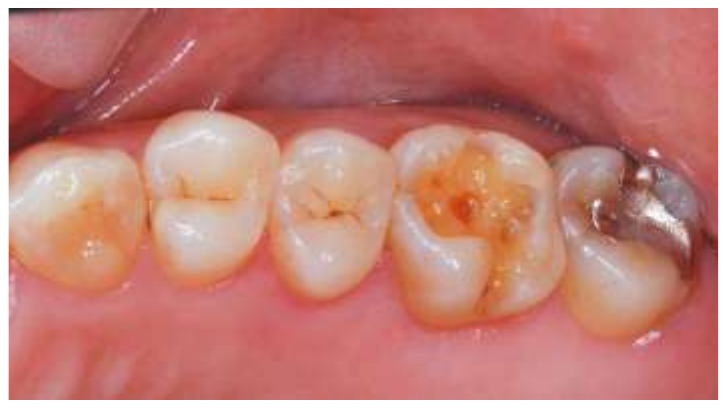
Fig. 2 Cavity preparation
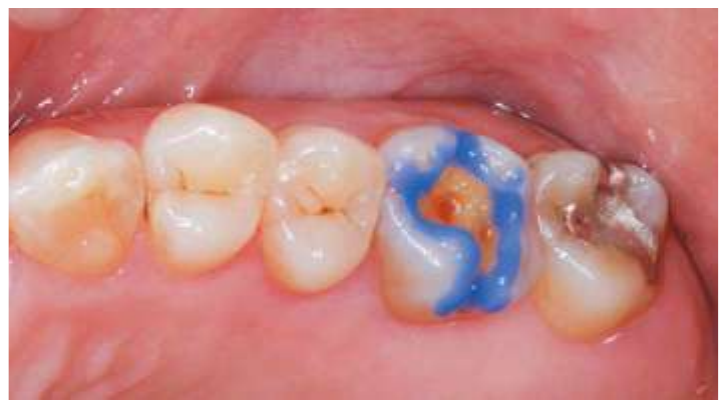
Fig. 3 Enamel etching
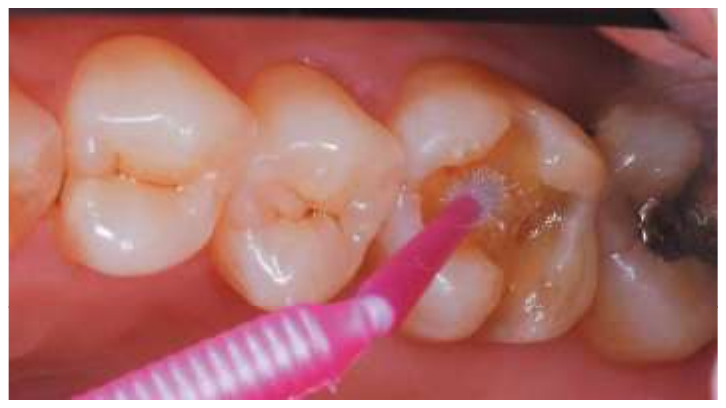
Fig. 4 BONDMER Lightless application
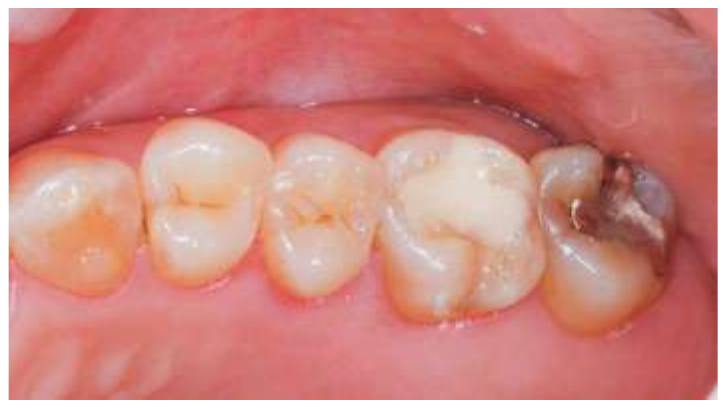
Fig. 5 Lining with OMNICHROMA FLOW
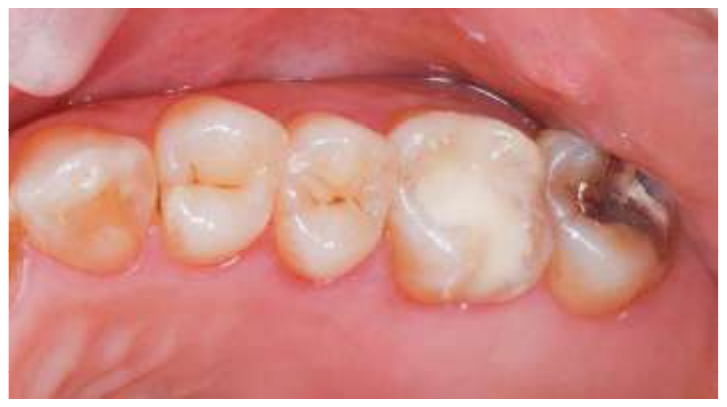
Fig. 6 Filling with OMNICHROMA
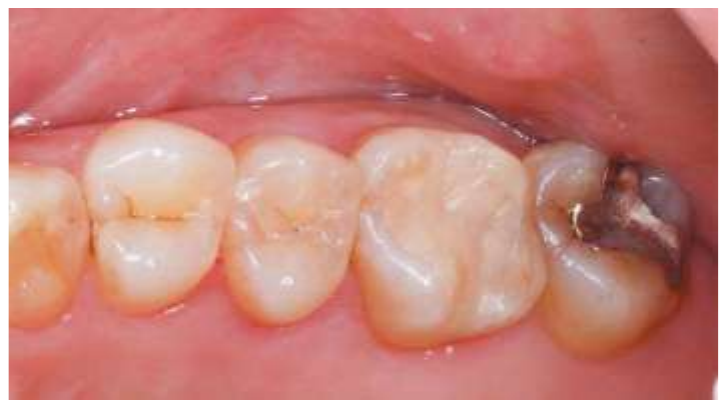
Fig. 7 Polished after light curing to finish
Case 2: Class II Premolar Cavity (Equivalent to A3, No Supporting Tooth Structure, No Discoloration)
Caries was found on the distal proximal surface of a mandibular premolar, and restorative treatment was planned. The cavity was opened, the carious lesion was removed, and the enamel cavity margin was adjusted. An overall check of the shade at this point showed a tooth shade (value) close to A3, with the cavity classified as Class II; there was no supporting tooth structure, but since there was no significant staining, metal color, or other factor requiring shade masking, the cavity was filled with OMNICHROMA alone. After enamel etching, the tooth surface was treated with BONDMER Lightless, then matrix band placement and tooth separation were performed. OMNICHROMA FLOW was then used to fill the cavity in increments through a process of repeated filling and light curing, with the occlusal surface filled last; contouring, occlusal adjustment, and polishing were then carried out as usual. The shade after filling blended well with the tooth structure, and the case was considered to be free of issues.
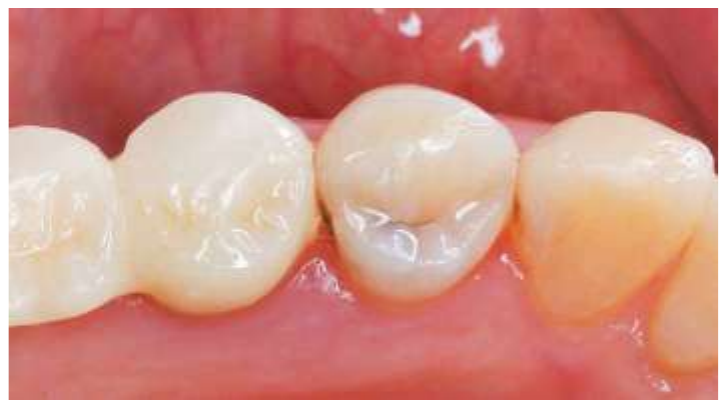
Fig. 1 Preoperative
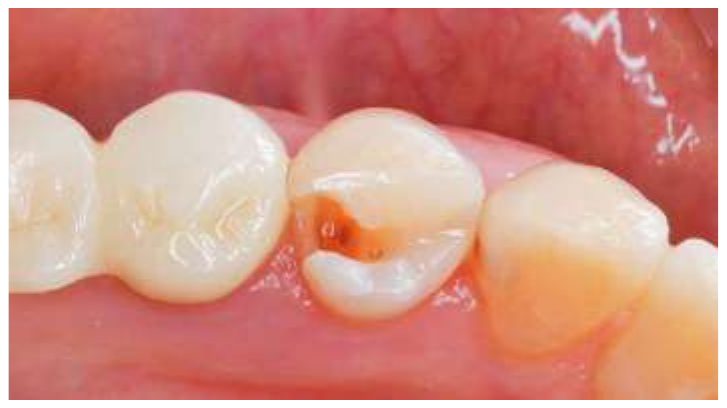
Fig. 2 Cavity preparation
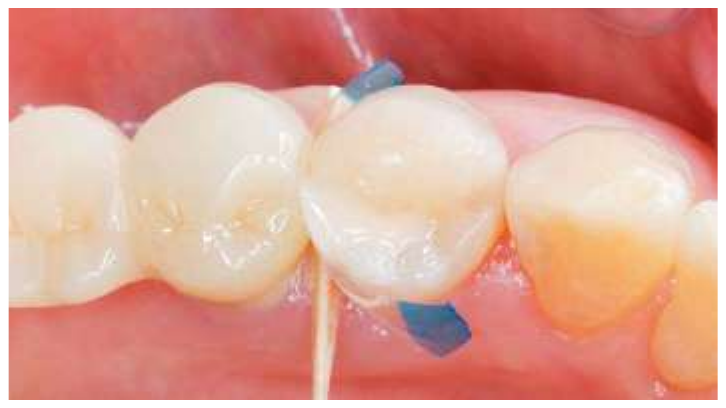
Fig. 3 Matrix band placement and tooth separation after BONDMER Lightless application, followed by incremental filling with OMNICHROMA FLOW
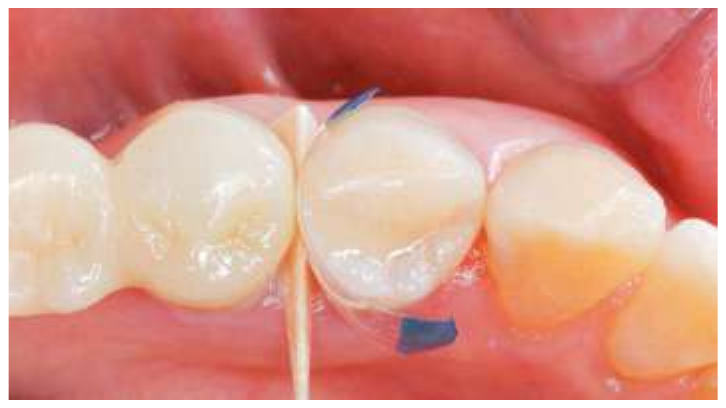
Fig. 4 Filling of the occlusal surface
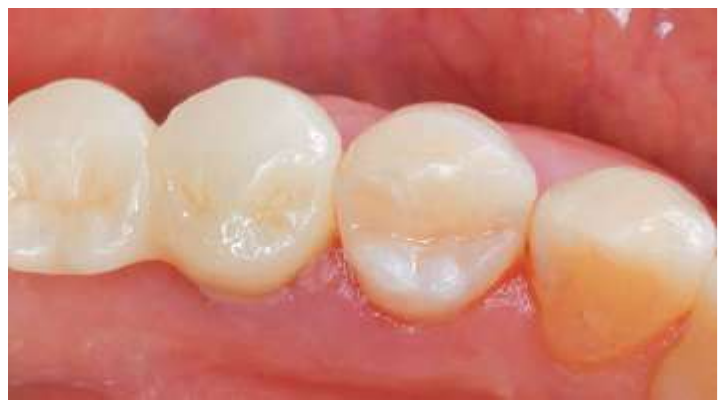
Fig. 5 Polishing to finish
Case 3: Class II Premolar Cavity (Equivalent to A3, No Supporting Tooth Structure, With Discoloration)
A case in which caries was found on the mesial proximal surface of a mandibular premolar and restorative treatment was performed. The steps up through opening the cavity, removing the carious lesion, and finishing the enamel cavity margin are exactly the same as in Case 2. An overall look at the cavity at this point showed a tooth shade (value) equivalent to A3, with the cavity classified as Class II; there was no supporting tooth structure, and no discoloration was found, but a metal inlay was visible in the adjacent area. In cases like this, the color of the metal must be masked using a blocker or similar material. Neglecting this may result in the metal color showing through and disrupting shade matching. That is why, in this case, filling was performed using OMNICHROMA BLOCKER together with OMNICHROMA.
The tooth surface was treated with BONDMER Lightless and a matrix band was placed, with OMNICHROMA BLOCKER applied as a thin outermost layer on the proximal surface. Refrain from layering it on too thick; the amount is sufficient if the layer is thick enough that the metal color no longer shows through. Next, the occlusal surface, now reduced to a simple cavity, was filled in increments with OMNICHROMA FLOW with light curing, followed by contouring, occlusal adjustment, and polishing. The shade after restoration blended well with the tooth structure, and there seem to be no concerns.
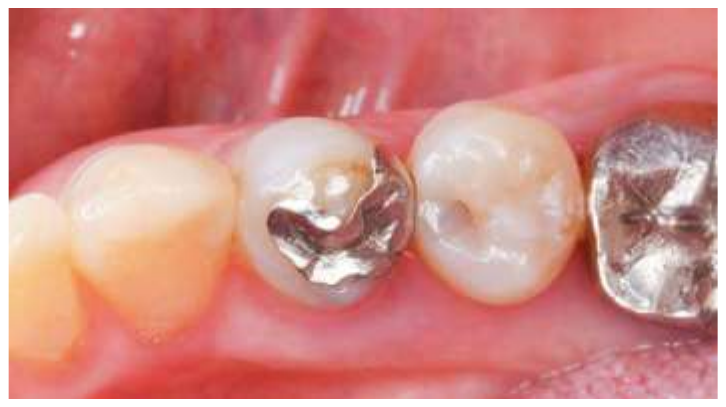
Fig. 1 Preoperative
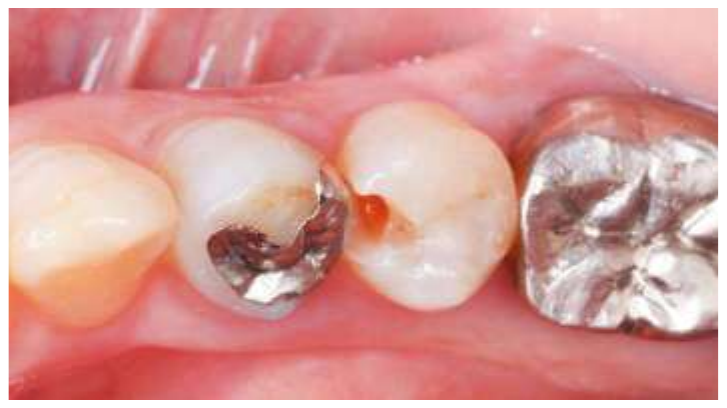
Fig. 2 Cavity preparation
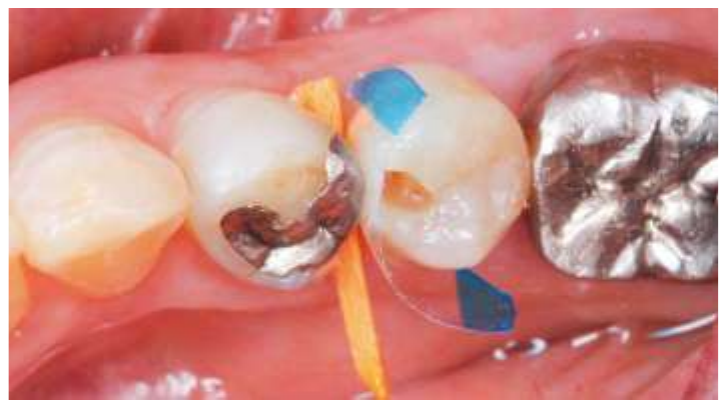
Fig. 3 Tooth surface treated with BONDMER Lightless, followed by matrix band placement and a thin layer of OMNICHROMA BLOCKER on the proximal surface
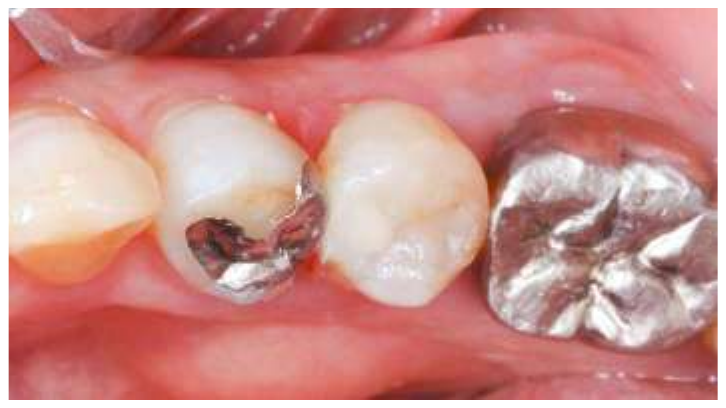
Fig. 4 Incremental filling with OMNICHROMA FLOW
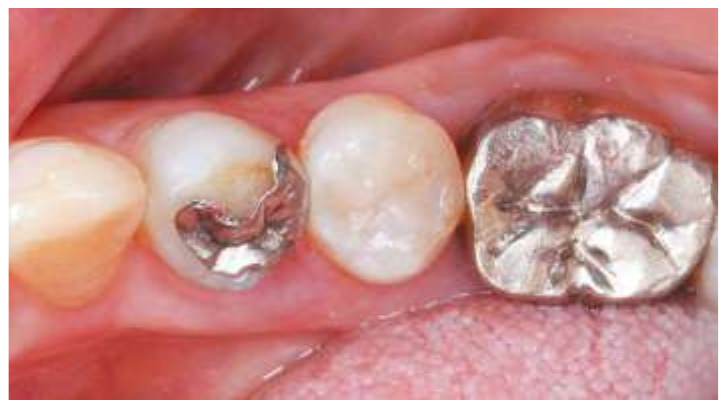
Fig. 5 Polished after light curing to finish
Case6: Class II Premolar Re-Restoration (Lower Value Than A3, No Supporting Tooth Structure, With Discoloration)
A case in which re-restoration was planned due to a chief complaint of esthetic dissatisfaction with the distal surface of a mandibular premolar. The distal restoration with mismatched shade was removed, the carious tooth structure was carefully removed, and the enamel cavity margin was then finished.
After enamel etching, the tooth surface was treated with BONDMER Lightless, and a matrix and wedge were used to securely place the proximal matrix band. In this case, the crown’s value was lower than A3, and I felt care was needed to avoid picking up the brighter shade of the adjacent molar. In addition, since discoloration was present within the cavity, masking and shade adjustment were performed not with OMNICHROMA BLOCKER as the masking material, but with the conventional composite resins ESTELITE UNIVERSAL FLOW Medium OPA3 and ESTELITE® SIGMA QUICK A3.5, after which the restoration was finished with OMNICHROMA FLOW.
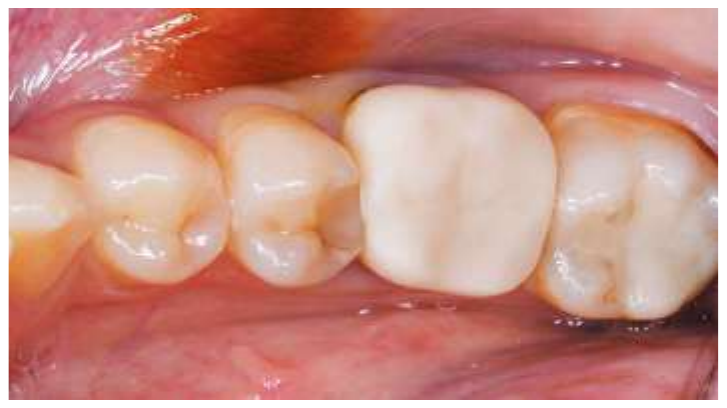
Fig. 1 Preoperative
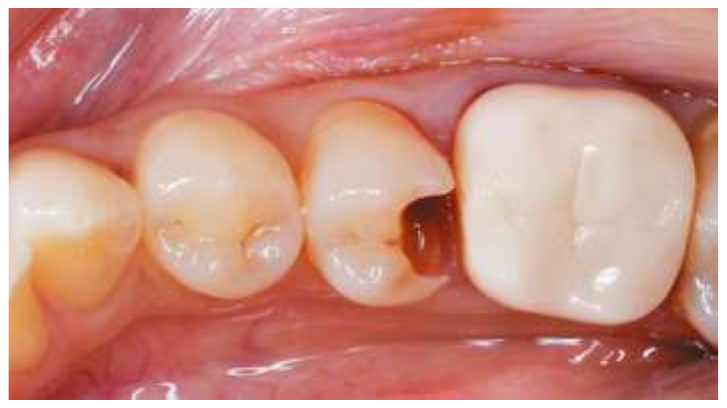
Fig. 2 Cavity preparation
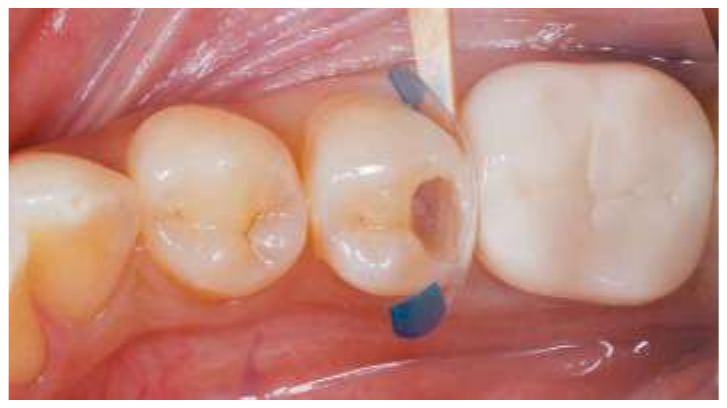
Fig. 3 Filling with ESTELITE UNIVERSAL FLOW Medium OPA3 and ESTELITE® SIGMA QUICK A3.5
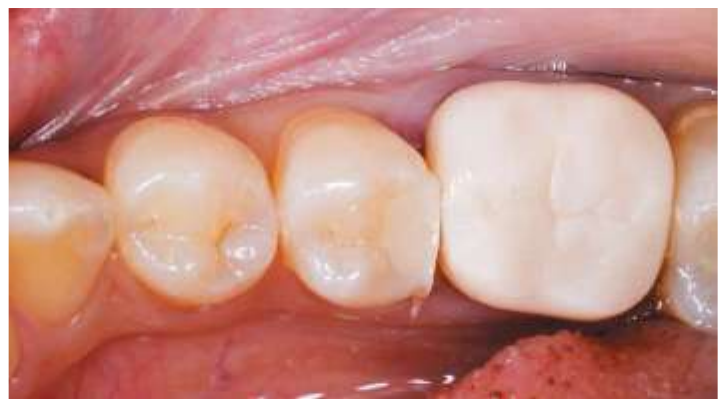
Fig. 4 Filling with OMNICHROMA FLOW
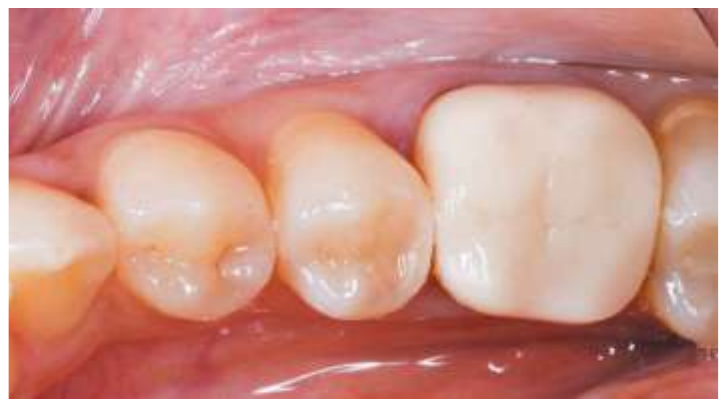
Fig. 5 Polished after light curing to finish